
Inviting teammates
Send an invite, choose a role, choose which workspaces they see.
By HeyThula · Updated
Invites are sent by email and carry a join link. Admins and owners can send them.
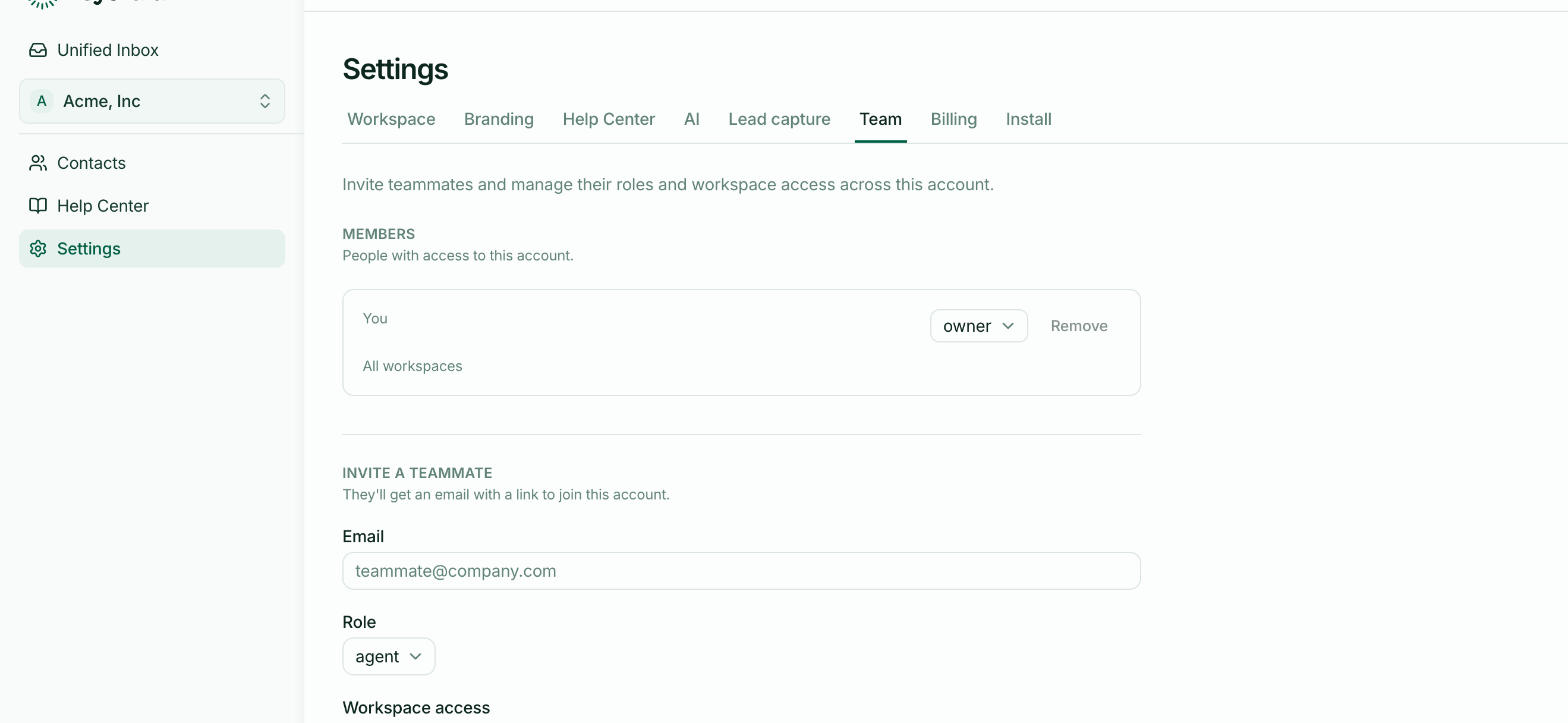
Step 1 — Open the Team tab
Settings → Team. Existing members are listed at the top; the invite form is below.
Step 2 — Enter their email and choose a role
Pick agent, admin or owner-level access according to what they need to do. Agent is right for most people — it covers all the daily support work. See Roles and what each can do.
Step 3 — Choose their workspace access
Give them all workspaces, which includes any you add later, or pick specific ones.
If you only run one workspace this makes no difference. With several, it's how you keep a contractor working on one product out of another's conversations.
Step 4 — Send
They get an email with a link. Following it and signing in adds them to your account.
Until they accept, they show in the member list as invited.
Seats
Each plan includes a number of teammates — 1 on Free, 3 on Pro, 8 on Scale, 25 on Agency. An invite takes a seat once accepted, so a full account needs an upgrade or a removal before you can add someone.
If an invite doesn't arrive
Check spam. Invite emails are the usual casualty.
Check the address. A typo produces a perfectly successful invite to nobody. Compare it against the member list and re-send if needed.
Check they're using the same address. The link ties to the invited address; signing in with a different one won't join the account.
Revoking
An invite that hasn't been accepted can be revoked from the member list, which invalidates the link.