
Your first fifteen minutes
Install, test, write two articles, turn on the AI.
By HeyThula · Updated
Four steps. The first two take about five minutes and give you a working support channel; the last two are what make it start saving you time.
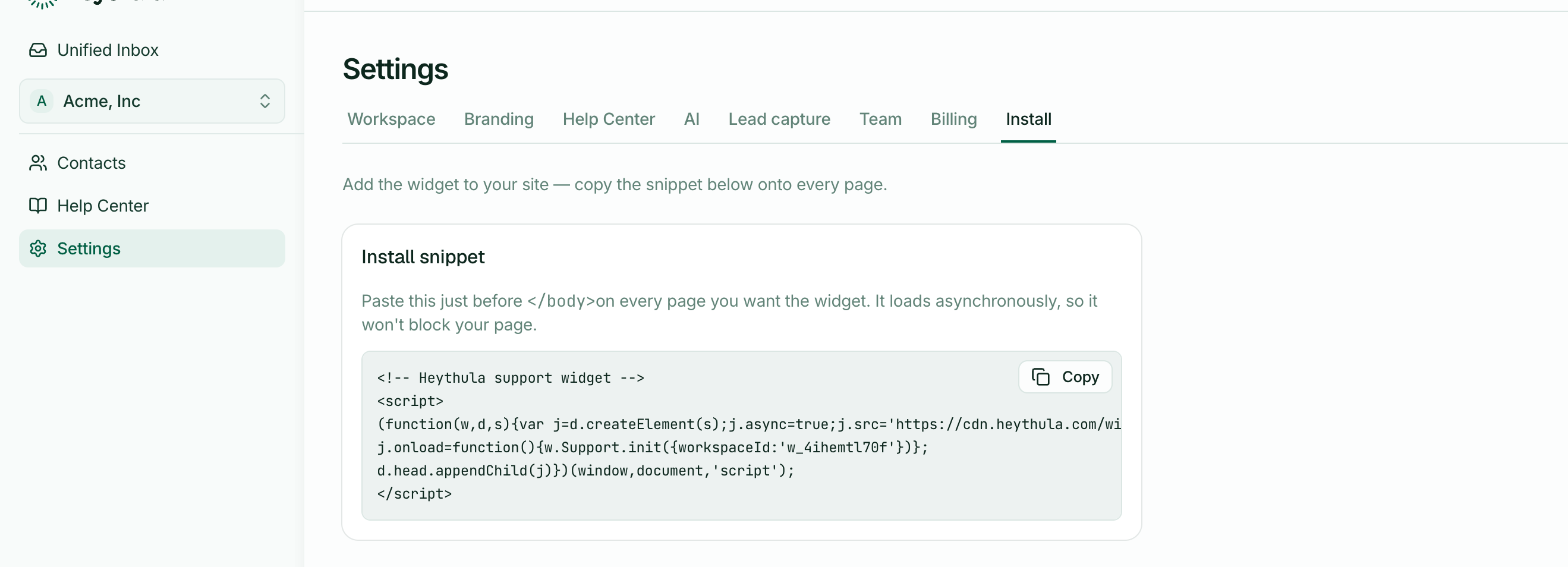
Step 1 — Install the widget
Copy the snippet from Settings → Install and paste it before </body> on your site. Full detail in Install the widget on your site.
Load your site and check the launcher appears in the corner.
Step 2 — Send yourself a message
Open the widget on your own site and send something. It should reach your inbox in a second or two. Reply from the inbox and watch it appear in the widget.
That round trip proves the whole channel works, and it's worth doing before you tell anyone the widget is live.
Step 3 — Write two articles
Pick the two questions you answer most often and write them up in Help Center. Not your whole documentation — two articles.
Press Set live on both. Unpublished articles are invisible to visitors and to the AI, so this step is the one that counts. See Drafts and publishing.
Step 4 — Turn on the AI
Settings → AI, then Answer with AI.
Do this after step 3, not before. The AI answers only from published articles, so with an empty help centre it has nothing to work with and every conversation hands over.
After that
Watch which conversations get flagged Needs human. Each one is a question your help centre doesn't answer yet, and each article you add takes a class of question off your team permanently.
That's the whole loop: answer once by hand, write it down, never answer it by hand again.
Worth doing soon
Set your brand colour and welcome message in Settings → Branding.
Identify your signed-in users, so conversations follow them between devices — see Identifying logged-in users.
Invite your team, so replies don't depend on one person — see Inviting teammates.